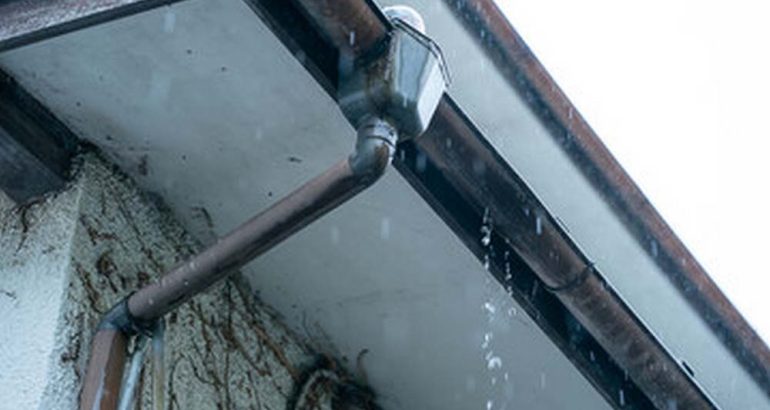
If you’ve noticed water spilling over the edge of your gutters or puddles forming around the base of your home, you may have a gutter leak.
While it may seem like a minor issue, ignoring gutter leaks can lead to costly damage, including water-stained ceilings, mould growth, and weakened foundations.
But don’t worry! You can tackle this problem yourself with a bit of know-how and some basic tools. In this guide, we’ll walk you through the process of fixing gutter leaks, step by step.
Why You Should Never Ignore Gutter Leaks
It might be tempting to brush off a small gutter leak as no big deal, but here’s why that’s a mistake:
- Water damage: Leaking gutters can cause water to seep into the walls, ceilings, or foundation, leading to mould growth and rot.
- Foundation issues: If water pools around your home, it can weaken your foundation over time, leading to expensive structural damage.
- Increased repair costs: The longer you leave the leak, the worse it gets. What starts as a small issue can quickly escalate into a large, expensive repair job.
By learning how to fix gutter leaks now, you can prevent these issues from snowballing.
What Causes Gutter Leaks?
Gutter leaks can happen for several reasons. Understanding the root cause will help you fix the problem more effectively.
Common causes include:
- Blocks: Debris like leaves, twigs, and dirt can block gutters, preventing water from flowing properly. This can cause water to spill over the sides and weaken the gutter system.
- Cracks: Gutters can crack or rust over time, especially in Brisbane’s humid climate. This leads to leaks and reduced functionality.
- Loose joints: Gutter sections connected by seams or joints can come apart due to pressure, weathering, or poor installation.
- Improper slope: If your gutters aren’t installed at the correct angle, water may not flow properly and could pool in certain areas, leading to leaks.
Now that you know what can go wrong, let’s dive into how to fix those leaks.
Tools You’ll Need to Fix Gutter Leaks
Before you get started, you’ll need a few basic tools:
- Ladder: To reach your gutters safely.
- Gloves: To protect your hands from dirt, debris, and sharp objects.
- Gutter sealant: A waterproof sealant designed for gutter repairs.
- Cleaning brush: To clear out any dirt or debris.
- Screwdriver or drill: To tighten loose fasteners.
- Bucket or tarp: To catch debris and keep the work area clean.
Step 1: Inspect the Gutter for Leaks
The first step in fixing gutter leaks is to inspect the gutter to locate the leak. Here’s how you do it:
- Climb your ladder: Make sure it’s stable and on level ground before climbing up.
- Look for visible cracks or holes: These are usually the source of the leak.
- Check the seams: If your gutters are joined together, look for areas where the joints may be loose or cracked.
- Look for debris: Make sure there’s no blockage that’s causing the overflow.
If the leak is located near a joint or seam, you’ll need to reseal it. If the damage is a small crack, it can usually be fixed with sealant.
Step 2: Clean the Gutter
Before you apply any sealant, you need to clean out the gutters thoroughly to ensure a strong bond.
Here’s how:
- Remove all debris: Use a scoop or gutter cleaning brush to clear out leaves, dirt, and twigs.
- Flush the gutters: Use a hose to rinse the inside of the gutters and clear out any small particles.
- Inspect the downspouts: Check to make sure the downspouts are clear and allow water to flow freely.
Cleaning your gutters ensures the sealant will stick properly and prevents any further blockages from forming.
Step 3: Seal the Leaks
Once your gutters are clean, it’s time to seal the leaks. Follow these steps:
- Apply gutter sealant: Use a waterproof gutter sealant or roofing cement for small cracks. Apply the sealant generously to the crack or seam.
- Smooth out the sealant: Use a putty knife or your gloved finger to spread the sealant evenly over the affected area.
- Allow drying time: Most sealants need at least 24 hours to fully dry and set. Avoid using the gutters during this time.
If the crack is particularly large, you may need to apply multiple coats or consider using a patching kit for larger repairs.
Step 4: Tighten Loose Fasteners
If you’ve noticed that the gutter is sagging or coming loose from the fascia, you’ll need to tighten the fasteners. Follow these steps:
- Use a drill or screwdriver: Tighten the screws or nails that hold the gutter in place.
- Re-secure loose joints: If the gutter sections have come apart, reattach them securely and apply sealant to the joint.
A loose gutter can cause water to pool in certain areas, worsening the leak and even leading to more damage.
Step 5: Test the Gutter
Once you’ve sealed the leak and tightened the fasteners, it’s time to test the gutter to make sure it’s fixed. Here’s how:
- Run water through the gutters: Use a hose to simulate rainfall. Check the repaired area to see if any water escapes.
- Check for any other leaks: While testing, make sure the entire gutter system is functioning correctly. Look for any other areas that might need attention.
If water still leaks after the repairs, you may need to apply additional sealant or consider replacing the section of gutter.
Step 6: Maintain Your Gutters
Now that your gutter leaks are fixed, you’ll want to keep them in good condition to prevent future leaks. Here are some tips:
- Clean your gutters regularly: Clean them at least twice a year to remove debris and prevent blocks.
- Inspect for damage: After a heavy storm, check your gutters for cracks or loose fasteners.
- Consider gutter guards: Gutter guards can help prevent debris from entering your gutters, reducing the risk of blocks and leaks.
When to Call a Professional Gutter Service
While fixing small gutter leaks is a manageable DIY project, there are times when it’s better to call in the professionals. If:
- The leak is too large or in a hard-to-reach area.
- There’s extensive damage to your gutters that requires replacement.
- You don’t have the tools or experience to complete the repair safely.
Get Your Gutter Leaks Fixed Today with Gutter Savvy Gutter Cleaning
Fixing gutter leaks doesn’t have to be a daunting task. With the right tools and steps, you can tackle minor repairs on your own.
However, if the job seems too big, don’t hesitate to call in the professionals. Gutter Savvy Gutter Cleaning is here to help with all your gutter repair needs in Brisbane.
Call us at 07 35225669 or get in touch for expert gutter cleaning and repairs!
FAQs
Can I fix gutter leaks myself?
Yes, most minor gutter leaks can be fixed with sealant, a cleaning brush, and a bit of elbow grease. However, if the damage is extensive, it’s best to consult a professional.
How do I know if my gutters need repairs?
Look for signs of water damage, cracks, rust, or visible leaks. If your gutters sag or if there are visible holes, it’s time for a repair.
What is the best sealant for gutter leaks?
Use a waterproof gutter sealant or roofing cement specifically designed for metal or plastic gutters.
How often should I clean my gutters?
It’s recommended to clean your gutters at least twice a year, but if you live in a heavily wooded area, more frequent cleaning may be necessary.
How long will gutter sealant last?
Gutter sealant can last anywhere from 1 to 5 years depending on the weather conditions, type of sealant used, and the amount of debris in your gutters.